Hướng dẫn Basic HTTP Authentication để bảo vệ thư mục trong Nginx
Mục tiêu
Bảo vệ thư mục http://example.com/test/ với đường dẫn server là /home/example.com/public_html/test/, file cấu hình Nginx /etc/nginx/conf.d/example.com.conf
1. Tạo file Password
Đầu tiên mình sẽ cần một file để lưu trữ thông tin username/password đăng nhập (đã được mã hóa) bằng cách sử dụng script Python http://trac.edgewall.org/browser/trunk/contrib/htpasswd.py. Ngoài ra, có thể sử dụng Apache’s htpasswd Tool. Tuy nhiên phải cài thêm vào server nên mình không khuyến khích sử dụng.
Download script về /usr/local/bin và chạy
cd /usr/local/bin
wget http://trac.edgewall.org/export/10791/trunk/contrib/htpasswd.py
chmod 755 /usr/local/bin/htpasswd.py
Giờ mình sẽ tạo file password /home/example.com/public_html/.htpasswd với user hocvps, password hocvpstest. Lưu ý bạn có thể sử dụng file bất kỳ và lưu ở chỗ nào cũng được.
htpasswd.py -c -b /home/example.com/public_html/.htpasswd hocvps hocvpstest
Tham số -c để thực hiện tạo mới file nếu chưa có, nếu file đã tồn tại thì sẽ overwrite do đó mất hết các user từ trước. Trong trường hợp bạn muốn add thêm user nữa thì bỏ tham số -c đi:
htpasswd.py -b /home/example.com/public_html/.htpasswd hocvps2 hocvpstest2
Update: các bạn có thể sử dụng trực tiếp tool này cho nhanh: http://www.htaccesstools.com/htpasswd-generator/
2. Cấu hình Nginx
Mở file cấu hình Nginx
nano /etc/nginx/conf.d/example.com.conf
Thêm nội dung như sau vào trong server { … }
server {
listen 80;
[...]
location /test {
auth_basic "Restricted";
auth_basic_user_file /home/example.com/public_html/.htpasswd;
}
[...]
}
Reload Nginx
/etc/init.d/nginx reload
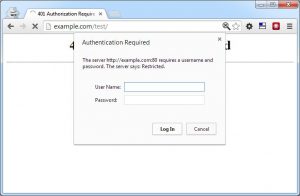
Giờ khi truy cập vào http://example.com/test sẽ có thông báo yêu cầu đăng nhập hiện ra:

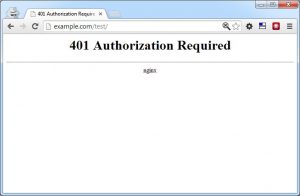
Nếu bạn không đăng nhập hoặc đăng nhập sai sẽ báo lỗi:

Chúc các bạn thành công!
Nguồn: hocvps
